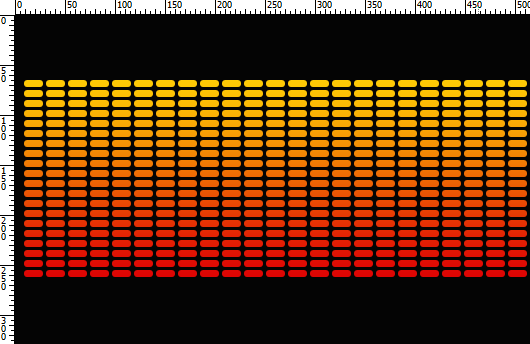
Here is a taste of what we are trying to accomplish in this tutorial.

It will look something like this:
Then Ctrl + X to cut them, and after CTRL + V to paste them.
Set the Opacity at 15% for the layer you just cut. It will look something like in example below:
Now we need to write a text: select Horizontal Type Tool (T) from your tool box and click somewhere in your document and start typing music.
Select font MgOpen Modata, apply font style Bold, set font size at 120px, and anti aliasing on Sharp.
Now in Photoshop CS4/CS5 you have a right tool bar i don’t remember if you have same toolbar in older Photoshop versions but anyway, if you don’t have the Character Tool on your right toolbar, go to Window top horizontal menu and select Character from there, then set the distance between letters at -95, and it will look something like in example below.
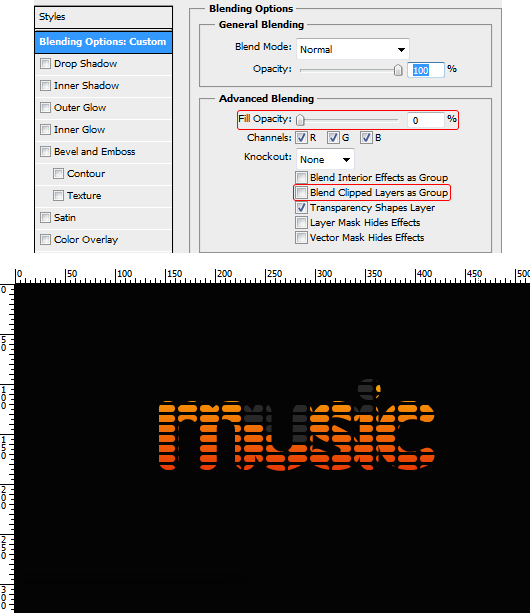
Select the text layer and Double Click on it (Blending Options), and modify Fill Opacity to 0%, and be sure to deselect Blend Clipped Layer as Group.
How to: Vertical Lines for a cool background


Step 1: Setting background
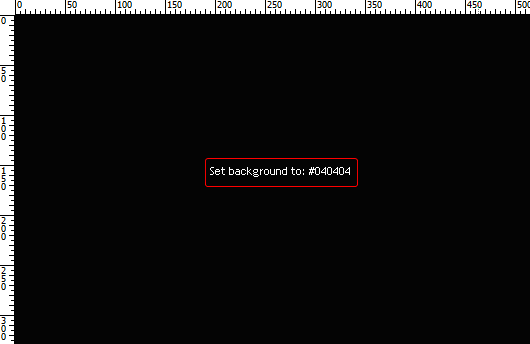
Create a 530×330 pixels RGB and 72 dpi psd document, then right click and select Layer from background and press OK, then double click on that layer, go to Color overlay, and set the color to: #040404.
Step 2: Starting to create bullets for equalizer
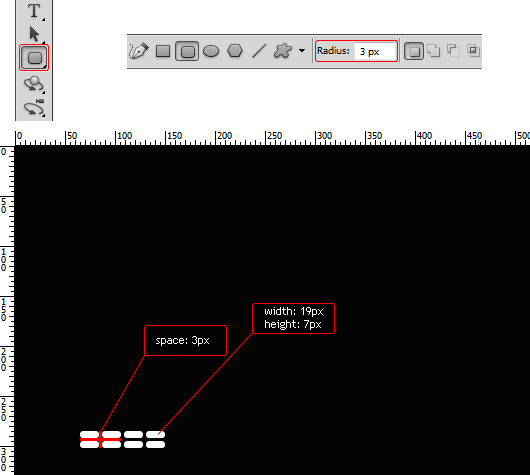
Select Rounded Rectangle Tool (U), then set the Radius: 3px, and start to draw the bullets. The bullets needs to have – width 19px / height 7px and a 3px space between them.
Step 3: Finalizing the equalizer pattern
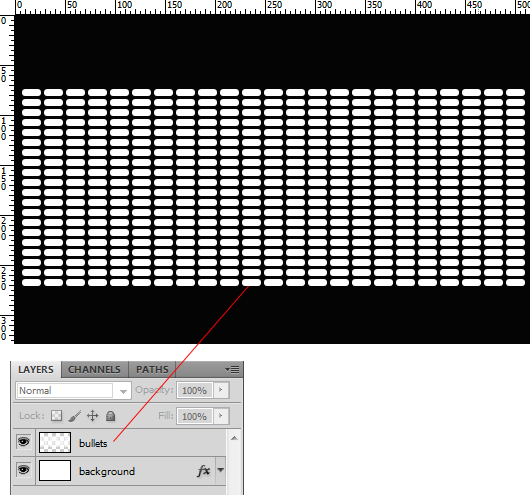
The best way to make this pattern is to make 5 bullets, select them all with Shift + Left Click and after Right Click – Merge layers, and duplicate the merged layer until it will look like the example below.
Step 4: Applying gradients on equalizer pattern
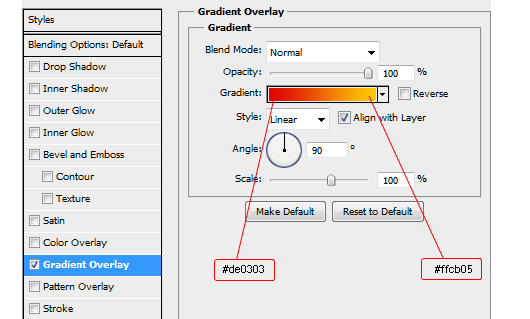
Double click on bullets layer (Blending options) . Apply Gradient Overlay with left color: #de0303 and right color: #ffcb05.
It will look something like this:

Step 5: Cutting equalizer pattern
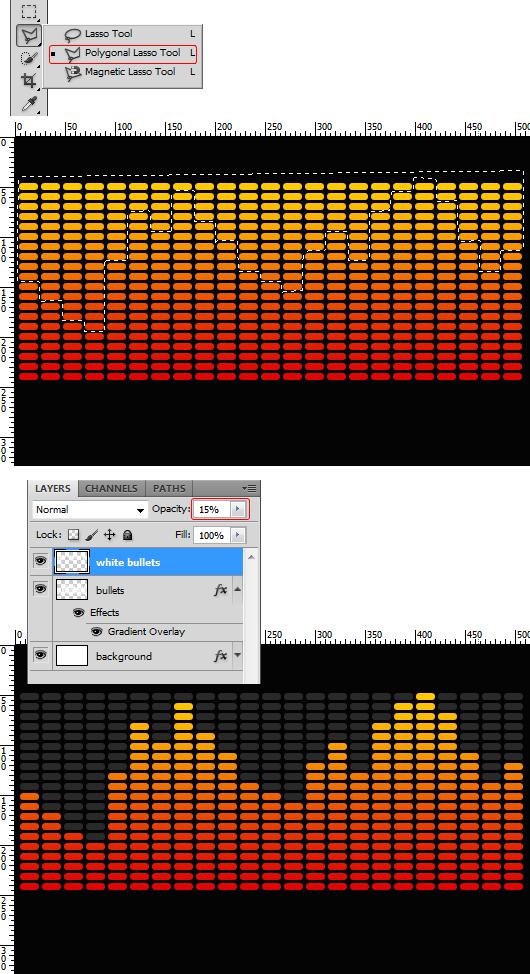
Select Polygonal Lasso Tool, and start draw some lines with it, including some of the dots in your selection, like below:Then Ctrl + X to cut them, and after CTRL + V to paste them.
Set the Opacity at 15% for the layer you just cut. It will look something like in example below:

Step 6: Adding text
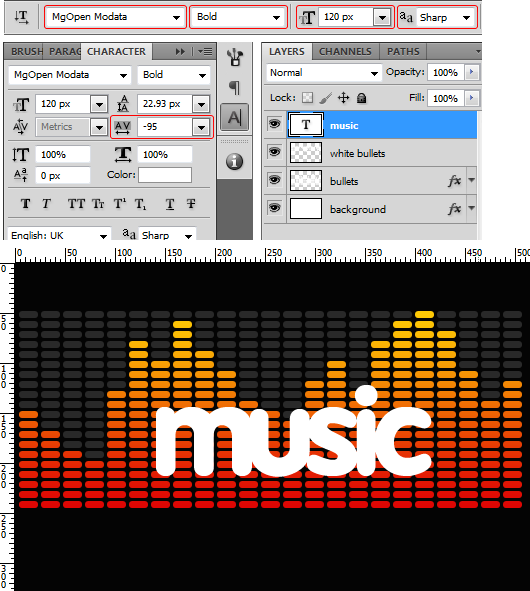
Here is the font i used (download).Now we need to write a text: select Horizontal Type Tool (T) from your tool box and click somewhere in your document and start typing music.
Select font MgOpen Modata, apply font style Bold, set font size at 120px, and anti aliasing on Sharp.
Now in Photoshop CS4/CS5 you have a right tool bar i don’t remember if you have same toolbar in older Photoshop versions but anyway, if you don’t have the Character Tool on your right toolbar, go to Window top horizontal menu and select Character from there, then set the distance between letters at -95, and it will look something like in example below.

Step 7: Using Layer Mask on text
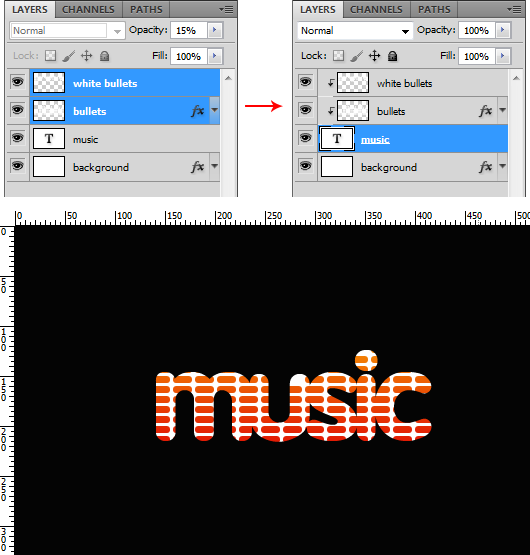
Now select the 2 layers , right click on them and apply Create Clipping Mask, see example below:
Step 8: Hiding unwanted graphics
Now we need to hide the white spaces that remains from clipping mask , how you can do that?Select the text layer and Double Click on it (Blending Options), and modify Fill Opacity to 0%, and be sure to deselect Blend Clipped Layer as Group.

Result:
The vertical lines that i made as a background for this tutorial, are made with some simple techniques that i explained in one of my tutorials:How to: Vertical Lines for a cool background


